The Ultimate Guide: How to Stain Furniture Like a Pro in the UK
Transforming your furniture with a fresh stain can breathe new life into tired wooden pieces, enhancing their natural beauty while providing essential protection. Whether you're revamping an old family heirloom or giving a charity shop find some character, this comprehensive guide will walk you through the entire process of furniture staining in the UK climate and conditions.
Getting started with furniture staining
Before diving into your wood staining project, it's important to understand what you're working with. Wood stain is a semi-transparent coating that colours timber while allowing the beautiful natural grain to show through. Unlike paint, which sits on the surface, quality wood stain soaks into the timber, bringing out its intrinsic patterns and textures. This makes it ideal for enhancing the character of wooden furniture whilst offering some protection against UV damage and everyday wear.
Essential Tools and Materials for the Job
Gathering the right supplies before you begin will make your furniture staining project flow smoothly. You'll need several grades of sandpaper ranging from medium to fine grit, tack cloths for removing dust, and lint-free cloths for application and wiping. Quality brushes or foam applicators are crucial for even application, especially when working with detailed areas. Don't forget protective gear including rubber gloves and safety glasses to keep yourself protected from chemicals. Most importantly, ensure you have a well-ventilated workspace by opening windows or working outdoors if the British weather permits.
Choosing the Right Stain for Your Project
The UK market offers various wood stain types, each with distinctive properties. Oil-based stains from brands like Dulux provide excellent durability and penetration, though they require longer drying times and proper ventilation. Water-based alternatives are more environmentally friendly with lower odour, making them suitable for indoor projects, though they might raise the wood grain slightly. Varnish stains deliver a glossy protective finish in a single application, while gel stains work brilliantly on vertical surfaces without dripping. For quick projects, lacquer stains dry rapidly but demand precise application. Consider Cuprinol for garden furniture or Dulux Trade Ultimate Woodstain which protects exterior wood for up to a decade in the challenging British climate. Your choice should reflect both the furniture's intended location and your personal preference for finish.
Preparing your furniture for staining
The success of your staining project largely depends on thorough preparation. Any wood can be stained successfully, but only if properly cleaned and stripped of old finishes first. This preparation stage might seem tedious, but rushing through it invariably leads to disappointing results and wasted effort.
Proper sanding techniques for different wood types
Sanding is absolutely essential before applying wood stain to ensure even absorption and a smooth finish. For new wood, start with medium-grit sandpaper to remove any mill glaze or roughness. When working with pine or other softwoods commonly found in UK furniture, consider using a pre-stain wood conditioner to prevent blotching, as these woods tend to absorb stain unevenly. For previously finished pieces, you'll need to remove all traces of old paint, varnish or wax. Strip paint or varnish with an appropriate remover, while mineral spirits work well for removing oil or wax. Always sand with the grain rather than against it to avoid scratches that will become more visible once stained. Finish with fine-grit sandpaper for a silky-smooth surface that will accept stain beautifully.
Cleaning and Prepping the Surface for Optimal Results
After sanding, thorough cleaning is critical. Remove all dust and debris using a tack cloth or slightly damp lint-free cloth. Any remaining dust particles can create tiny bumps in your finish or prevent the stain from penetrating properly. For woods with high tannin content like oak, a pre-stain conditioner can prevent blotchiness. If you're dealing with a piece that might have stains or could potentially bleed through, apply a stain-blocking primer before proceeding. Ensure the wood is completely dry before moving to the staining stage. This meticulous preparation might seem excessive, but it distinguishes amateur efforts from professional-looking results in your DIY woodworking projects.
The staining process step by step
 With proper preparation complete, you're ready to transform your furniture with stain. The application process requires patience and attention to detail, but the rich, professional results are worth the effort. Working methodically will help avoid common pitfalls that can ruin your hard preparation work.
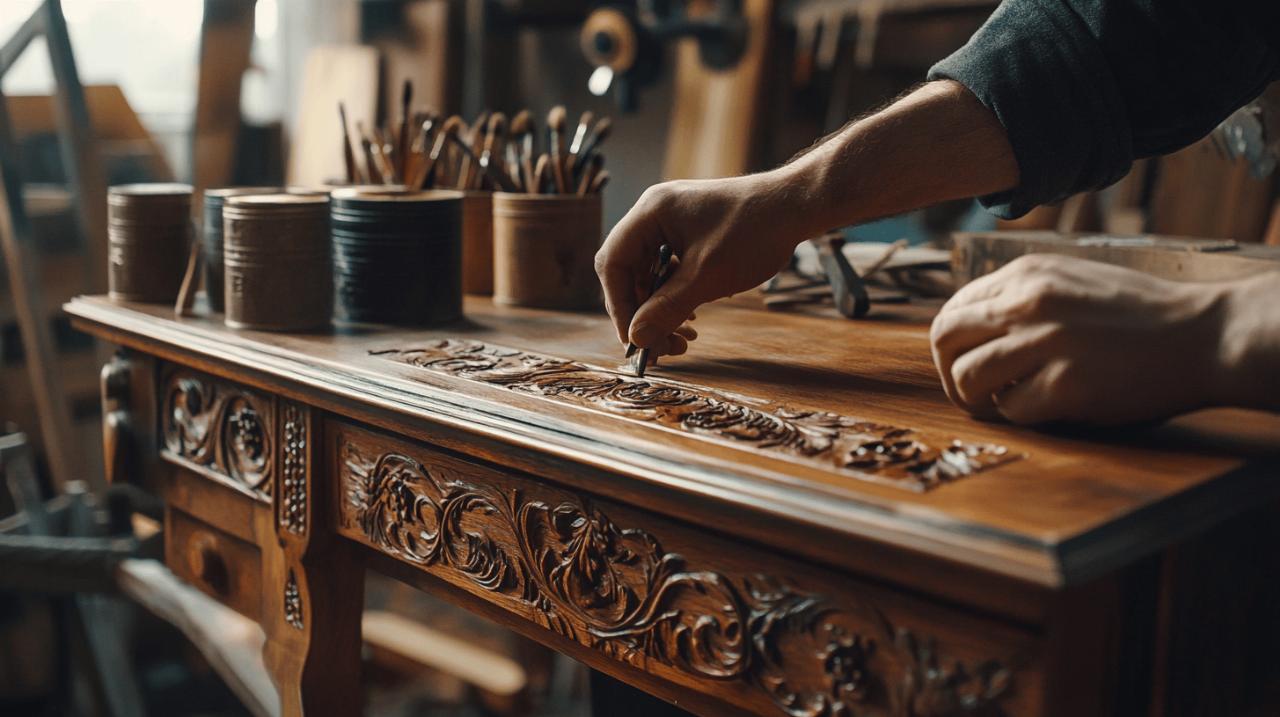
Applying and Wiping Techniques for an Even Finish
The key to successful wood staining lies in the application technique. Using a foam brush, quality paintbrush or lint-free cloth, apply the stain generously but evenly to the wood, always working in the direction of the grain. This helps the stain penetrate uniformly into the wood fibres. Allow the stain to sit for a few minutes according to the manufacturer's instructions. The longer the stain soaks in, the deeper the colour will be, but be careful not to exceed recommended times. Next comes the crucial wiping stage using a clean, lint-free cloth to remove excess stain. Wipe firmly along the grain, ensuring no puddles or streaks remain. For a deeper colour, you can apply multiple thin coats rather than one heavy application, which risks becoming sticky or blotchy. Allow each coat to dry completely before applying subsequent layers.
Common mistakes to avoid during application
Several pitfalls can compromise your furniture staining project. Avoid applying stain to dirty or insufficiently sanded surfaces, as this leads to patchy, uneven results. Never skip the wiping stage, as excess stain that remains on the surface will become sticky and never properly cure. Rushing between coats without allowing adequate drying time can cause the finish to lift or bubble. Working in poor lighting conditions makes it difficult to spot uneven application or missed areas. Staining in very humid conditions slows drying and can trap moisture under the finish. Finally, failing to stir the stain thoroughly before and during application can result in inconsistent colour as pigments settle to the bottom of the tin. Taking time to avoid these common errors will ensure your home decor projects achieve professional results.
Finishing and protecting your newly stained furniture
The staining process isn't complete until you've properly sealed and protected your newly enhanced furniture. Without this crucial step, your hard work remains vulnerable to damage from moisture, UV rays, and everyday use.
Sealing options for different usage scenarios
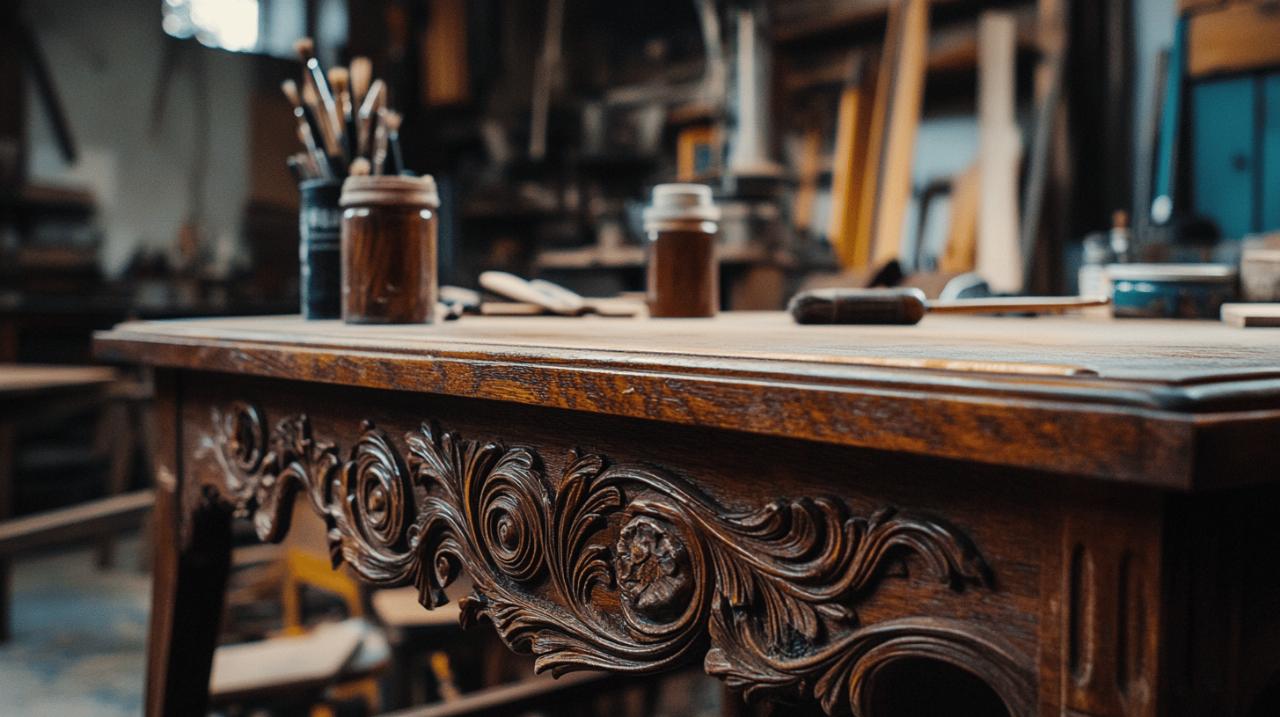
The right sealer depends on how and where your furniture will be used. For dining furniture that will see heavy use, polyurethane varnish offers exceptional durability against spills, heat, and wear. Oil-based versions provide a warm amber glow that deepens over time, while water-based formulations maintain the wood's natural colour with less yellowing. For decorative pieces with less handling, traditional wax creates a soft, natural-looking finish that's easily maintainable but offers less protection. Exterior furniture requires specialised outdoor sealants like those from Cuprinol Garden Shades, which provide weather resistance for garden decking and outdoor seating. For kitchen items that may contact food, look for food-safe finishes. Apply your chosen sealer according to manufacturer directions, typically with a high-quality brush or applicator, and allow full curing time before putting the furniture into service.
Maintenance tips to keep your furniture looking brilliant
With proper care, your stained furniture can maintain its beauty for years. Clean stained surfaces regularly with a slightly damp cloth, avoiding harsh chemical cleaners that can strip protective finishes. Address spills immediately to prevent staining or water damage penetrating the protective layer. Position indoor furniture away from direct sunlight to prevent colour fading, and use coasters and mats to protect surfaces from heat and moisture. For outdoor pieces, consider covering during extreme weather or storing them during winter months. Inspect the finish annually for signs of wear or damage, and touch up as needed before problems worsen. Every few years, depending on use, you might need to lightly sand and reapply a fresh coat of sealer to maintain protection. With companies like Grain & Frame offering quality furniture and expert advice through their customer service line at 0121 270 3399, you can always seek professional guidance for maintaining specific pieces.